Don’t forget to go through the in-game tutorials, they can be very helpful. When in trouble, try reading the FAQ, readme and in-game help. Also do a search on your problem in the forum. Still no answer? go ahead and post your question!
Especially for the people who haven’t played Bridge Builder or Pontifex yet, here’s a small collection of basic bridge building techinques and hints to get you started.
For an easy start, stick to the ‘Normal‘ edit mode. You don’t really need tha advanced features to beat at least half of the levels.
Triangles are your friends
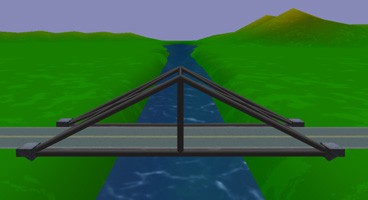
For the bridge to be stable, it has to basically consist of triangles. Any other shape with more sides will tend to bend and collapse. That’s the reason all bridge links have crossbeams in Pontifex II. So you should stick to triangle “nets” as the basic elements of your bridges for all small and medium sized structures.
Analyze it
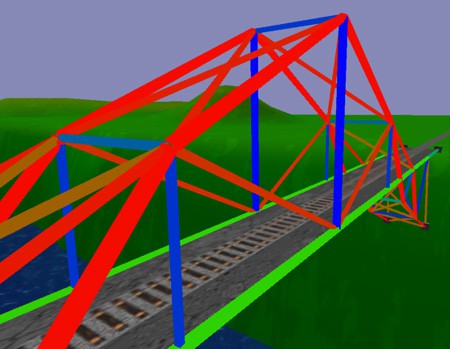
This is pretty obvious, but nevertheless worth mentioning as it’s essential for understanding the game: Always use the ‘Stress‘ feature to see which elements are stressed more (red) or less (green). If the bridge breaks, try to reinforce the red parts. Try turning on the ‘Max‘ option to see the maximum stress for every beam. Elements which stay solid green all the time are candidates for removal. An efficient bridge has the stress distributed evenly, i.e. the max stress is nearly the same for all beams.
Keep it smooth
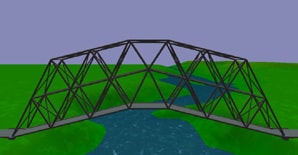
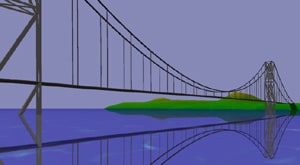
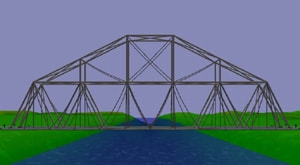
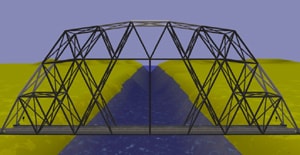
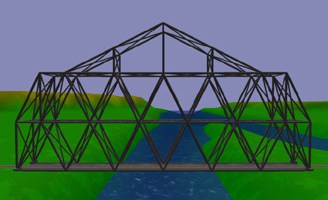
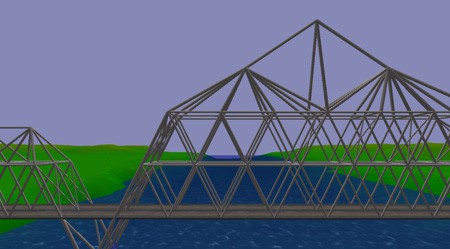
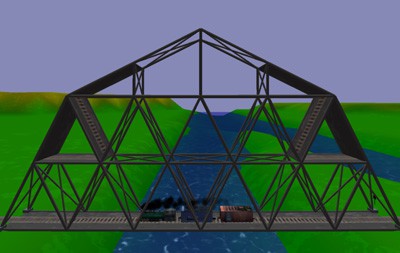
In order to build a good bridge, you have to try to distribute the stress evenly on as many beams as possible. A good way of achieving this is by giving the main load-bearing structure an oval (round) shape. Don’t get me wrong, of course you should stick to the triangles – but try to make your bridge “round” as a whole (which is kinda obvious for suspension bridges 🙂 ). Take a look at these examples to get the idea:
Make use of the material variety
Having trouble building a certain bridge within the given budget? Let’s take a look at the different material prices. For a 8 HD grid unit piece, they are as follows:
| Cable | $80 |
| Iron | $100 |
| Steel | $200 |
| Suspension Cable | $300 |
| Heavy Steel | $400 |
| Hydraulics | $400 |
| Iron Deck | $600 a piece |
| Steel Deck | $1200 a piece |
The material strength roughly corellates with the price.
Learn to use the advantages of the different materials. Obviuosly, since steel and heavy steel are expensive, always try to get away with using light steel only, unless you have problems making some part of your bridge strong enough. On the other hand, if you got enough money, you can try making extensive use of heavy steel, which sometimes allows you to finish a level very quickly 🙂 .
On levels with a limited choice of materials (e.g. iron only), you can get stronger beams by using deck pieces for the support structure. You have to switch to Complex mode first. Then just click on ‘Deck‘ to toggle deck piece building and put deck pieces where you need them.
The complex mode has some advanced features, for example, it allows you to build steel frame decks. I’ll cover complex mode editing in the upcoming ‘Advanced bridge building techniques’ chapter.
Make it short
As you’ve probably noticed, Pontifex II calculates each beam’s cost according to material type and length – so longer beams cost more. To reduce the cost of your bridge, try shortening some of the beams – especially the ones that don’t get under much stress during the test runs. Shortening a couple of steel or heavy steel beams can save you quite a chunk of money that you can use to improve some other parts of your bridge. Be warned though – shorter beams are weaker, so don’t make them too short!
Learn from others
Learn from other’s bridges! Visit the forum and see what’s getting posted there. Check out the Records page (Warning: spoilers!) and the Bridges section on BridgeBuilder-Game.com. You can learn a lot of tricks by examining others’ bridges. Get inspired and build even better ones!
